3D Pinhole Fun! - Making the Stereoscopic Film Box Pinhole Camera
14 49 Share TweetAfter a brief hiatus, I’m back with yet another pinhole tutorial. This time I’ll show you how I created my first stereoscopic (that’s 3D to most people) pinhole camera. Read how after the jump!

What you’ll need;
- Two 35mm film boxes
- A roll of 35mm film
- An empty 35mm film canister with a small piece of film still attached (You can get these at any photo lab, they throw them away so they’ll be more than happy to give them to you)
- Aluminium foil (I cut mine from a baking tray)
- Needle
- Pen/pencil
- Black marker
- Ruler
- Scissors/craft knife
- Black tape
- Regular tape
- Black card
- Paper clip
- Self adhesive foam pads
First, open up one of your empty film boxes like so

Draw a X to find the centre and draw a small square in the panel shown. Cut out the square with a craft knife


Next, mark along the creases of the left panel two 40mm by 1mm slots. Carefully cut these out also


Making the pinhole
Cut out a small square from your aluminium foil, 2cm by 2cm will be enough, and carefully pierce the centre. Just push the tip through, but not the entire needle. The idea here is to get the smallest hole possible. ’The smaller the pinhole the sharper the picture quality’ apparently…


Take the piece of foil and align the pinhole to the square from your film box. Tape this in place with some black tape

Using a black marker, colour the inside of the box. This reduces internal reflections which will improve the quality of your images

Fold the box back to it’s original shape and tape the long back edge

Repeat all the above steps so you have two pinhole boxes

You now need to join both boxes together. For this you’ll need some foam pads
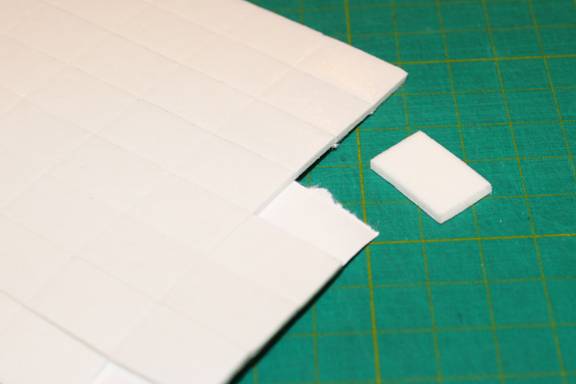
Holding one of the boxes as shown, stick the foam pads to form an even “layer”. Be careful not to cover the slot you made earlier (you’ll find out why later)


Double the thickness with another layer of pads

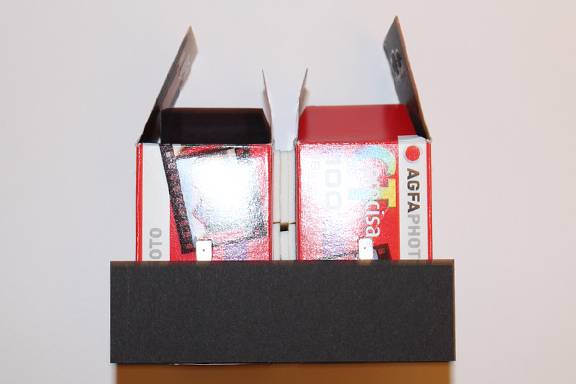
Grab the other box and repeat the process with the opposing side as shown

Only one layer is sufficient this time
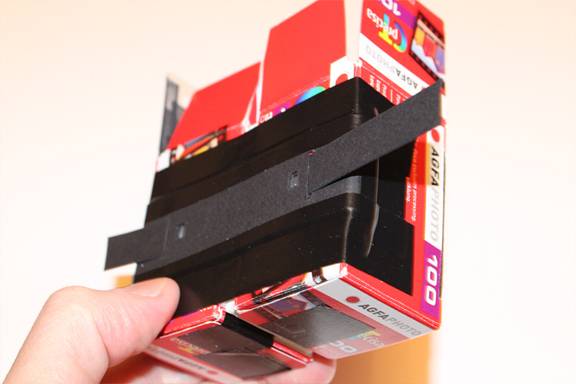
Align both boxes and stick together


Making the shutter
Take a piece of black card and cut a rough piece to the size of 10cm by 2.5cm. Hold this central to the pinhole camera and mark two vertical lines where the pinholes lie
Cut two small boxes, 5mm by 5mm, roughly from the centre of these lines, then cut two more 10mm by 1mm slots from either side. Cut another additional piece of card to the measurements of 12cm by 1cm

Carefully thread this new piece through the slots as shown


Pull this piece to the right slightly


With a pen, draw around both boxes

Pull out this piece of card and cut out the marked boxes


Re-thread this card as before and your shutter is complete! Test it by pulling it to the right or left


Tape this to the film box, aligning the holes of the shutter with the pinholes of the box/camera body


Loading the film
Before we load the film we need to add some tape to the back face so the film can run smoothly. You do this by cutting a long thin piece of tape and sticking it to the foam padded area in the centre


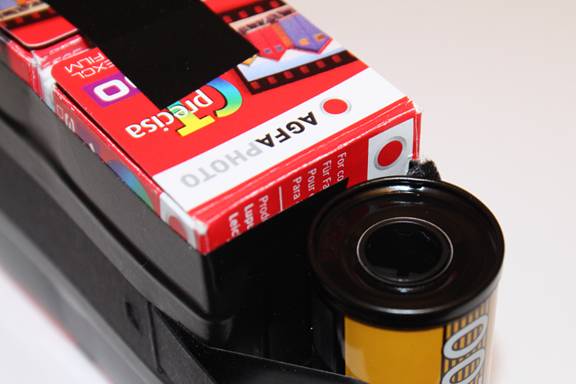
Take your fresh roll of film and thread it through the slot on the left

then through the centre…

and out the right side


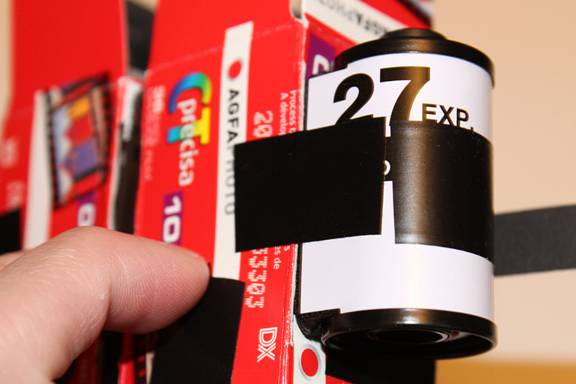
Cut off the film header then tape the tip of this fresh roll to the film tip of the empty canister

Push in the lip of the canister and secure with black tape


Repeat this on the reverse side

Cut a small piece of card, roughly to the size 5cm by 2cm

Stick this on back where the film strip is exposed


Begin light proofing the camera by covering the box with more tape. Remember to pay attention around the film spool areas
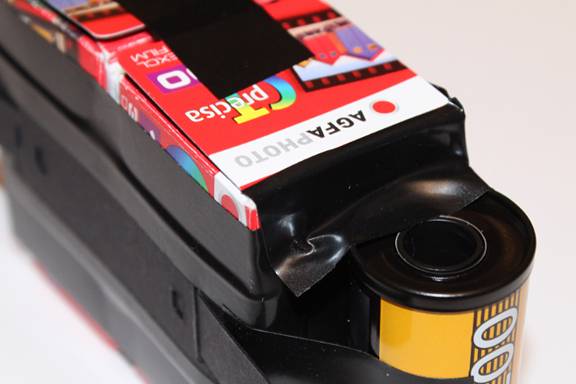
Box covered!

You’re nearly there!!!
Underneath the empty canister, tape a piece of paper/tissue to add tension to the winding mechanism. Adjust the tape by winding slowly and if the spool doesn’t spin back after winding, you’ve got it right!


Add a paper clip and you have a winder!

Camera complete

Optional extra
Cut a small piece of black card roughly to the size of 5cm by 2cm

Add two pieces of tape to either side

With the tack side facing up, fold back the tape


With this little extra you can now shoot single framed shots just like my previous pinhole camera. To do this cover any one pinhole and use the shutter as usual


For the twin image shots, just stick it to the centre when not in use


Shooting
Every pinhole is different, so it would be useless for me to list you a set of exposure times. Many people prefer to use pinhole calculators on the web to determine this and as much as this is recommended, I just guessed with this test roll as with the others :)


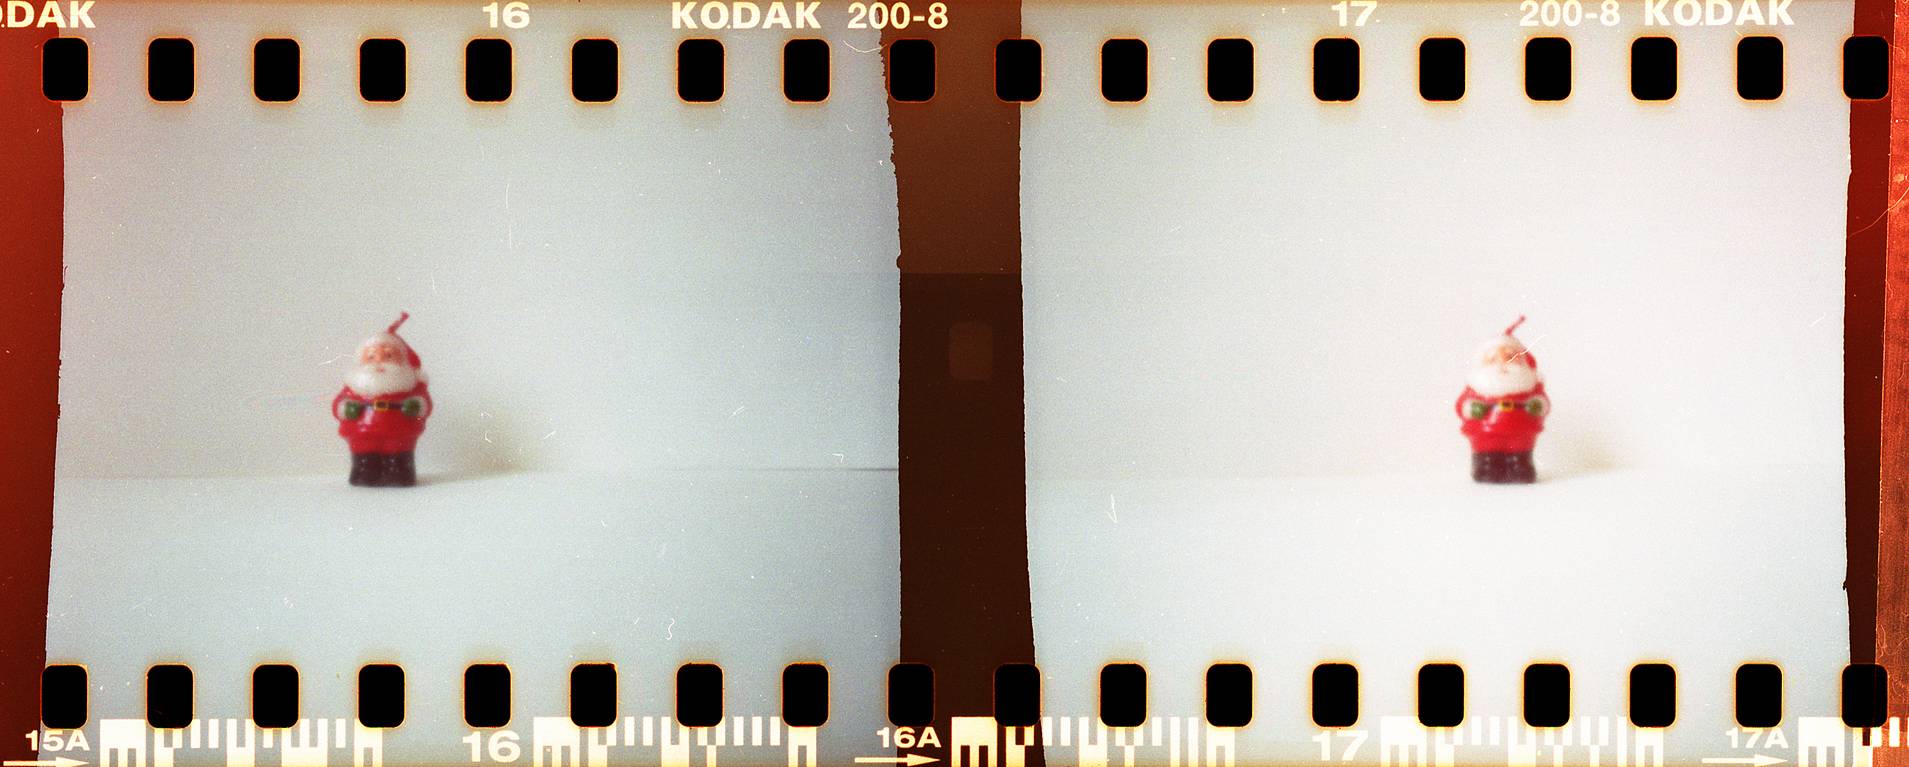
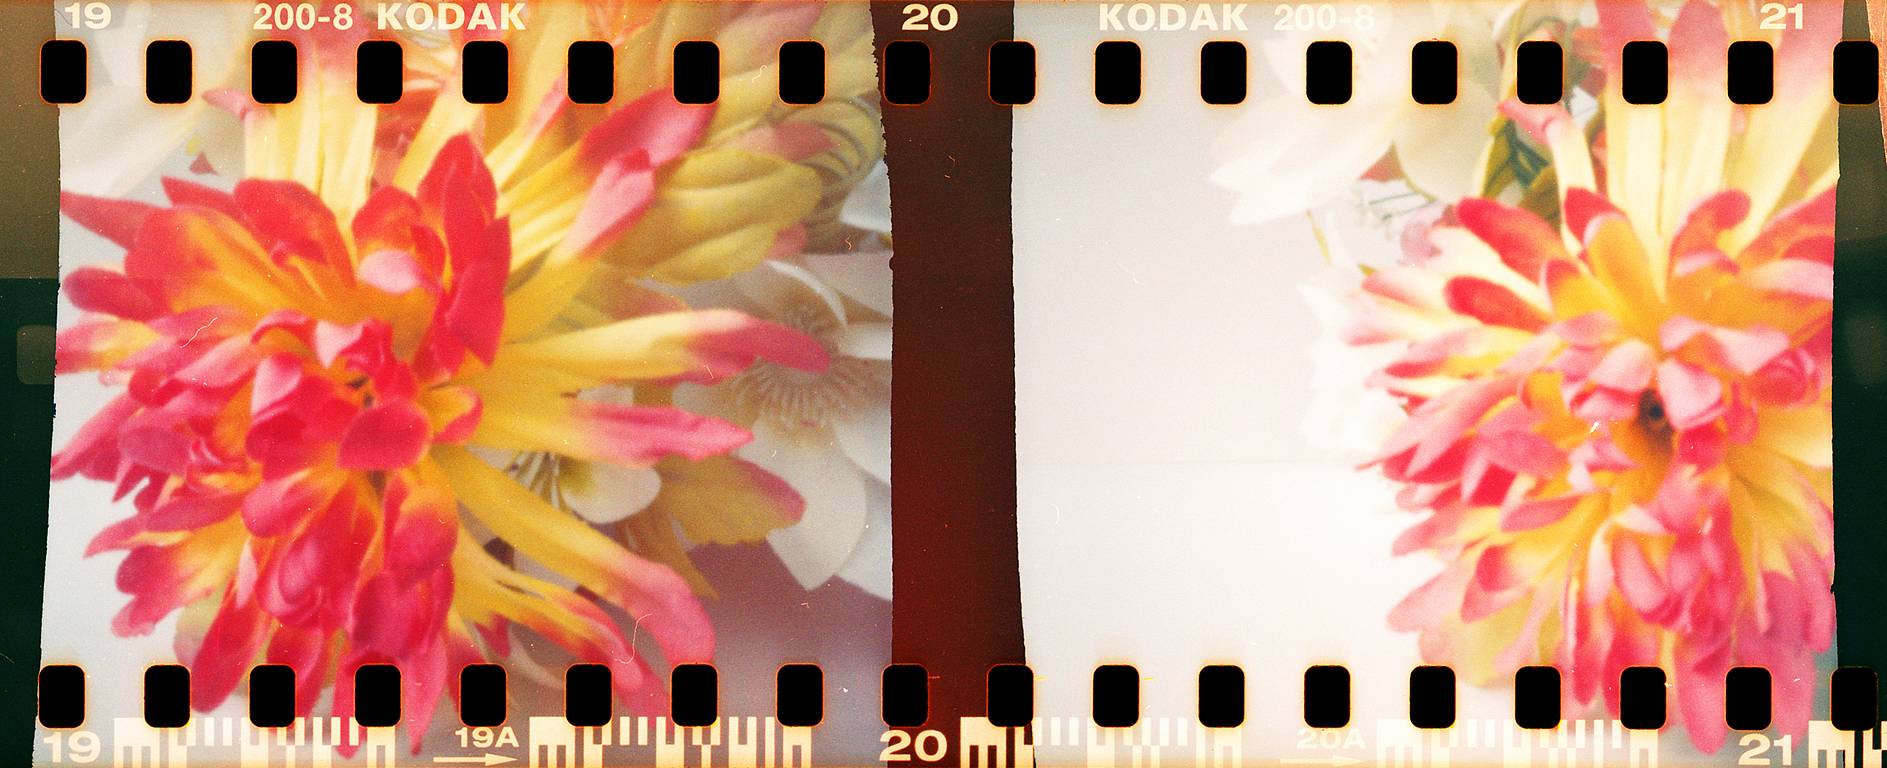

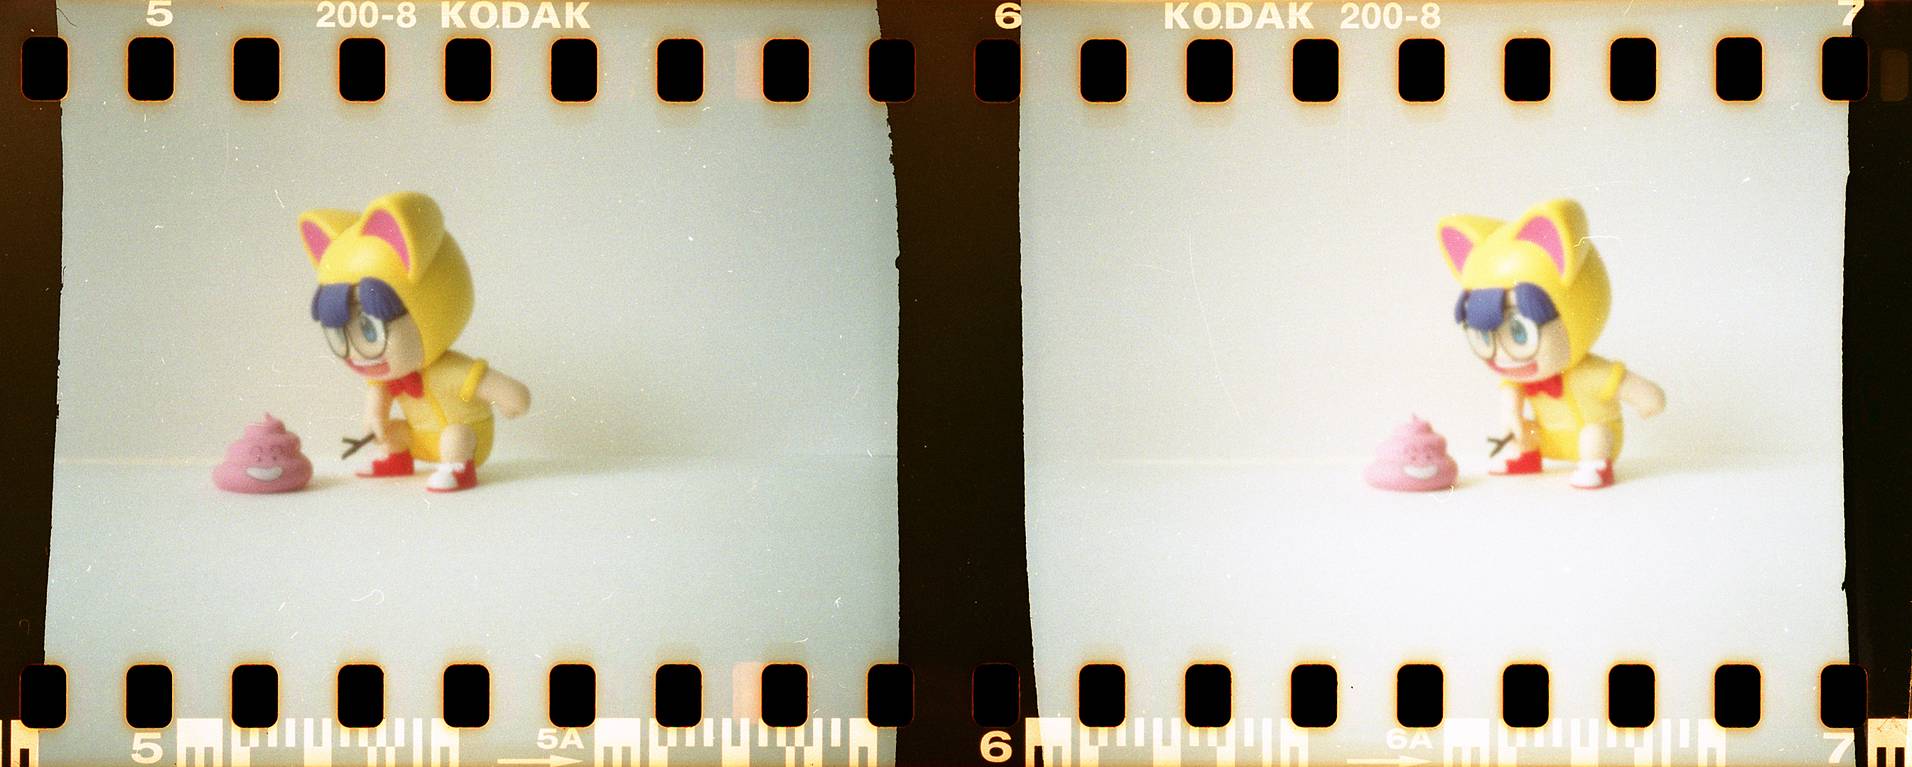
For these examples I used 200 ISO film and shot in daylight. The exposures varied from 1-20 seconds and sometimes even more
To advance by one frame, simply rotate counter clockwise by two full turns
3D imaging
If you look carefully at the individual frames of each shot, you’ll notice that they are not exactly the same. The placement and distance of the pinholes allows you to capture the subject(s) at slightly different angles. If you overlap and animate these frames, alternating between them, you get the illusion of depth, a 3D image.
To keep things simple I used the mini movie feature on Lomography to animate mine. To see the effect, click on the image and hit play
Okay, that’s it from me. I hope you enjoyed my ramblings and thanks for making it this far! I just noticed how much I wrote?!! Thank you for stopping by and checking out my tutorial. I’ll see you next time for more pinhole fun :)
LLK
written by lostlittlekid on 2013-05-26 in #gear #tutorials #camera #tutorial #sprockets #tipster #film-box #pinhole-camera #3d #home-made #stereoscopic


14 個留言